
Send all your MIDI devices to your Studio computer using one Ethernet Cable!
The mioXL is a studio workhorse. With all its MIDI inputs and outputs you can connect all your MIDI gear to your computer so you always have access to it in your DAW.
Previously, we took a look at how to connect the mioXL to your computer via USB and use your MIDI gear with your DAW. In today’s post, we’re going to take a look at how to connect multiple MIDI devices to your mioXL and send their signal to your computer using only an Ethernet cable.
Because of the RTP MIDI capabilities on the mioXL, you can send up to 22 discrete MIDI connections to your computer from the mioXL, meaning your computer will have a separate connection to each of your MIDI devices, even with only one Ethernet cable as the connection.
Let’s dive into how to make this happen.
How It’s All Connected

To start, it’s worth mentioning how simple the connection is. In this case, I have two MIDI Controllers connected to my mioXL.
1) A Nord connected to the DIN 1out port
2) A Oakboard Slide Duo connected to a USB host port on the mioXL
The mioXL is connected to a network switch via an ethernet cable and my computer is connected to the same network switch using an ethernet cable as well. The beauty of this setup is these could be separated by a long distance or in a completely different room-as long as they’re on the same “network”.
Auracle for X-Series
We’re going to use Auracle for X-Series, the free control software from iConenctivity to setup and manage our MIDI connections. If you haven’t yet, download Auracle for X-Series for free.
Renaming MIDI ports
When connecting multiple MIDI devices to your interface, it’s helpful to rename your connections, so you know what each connection is. To start, click MIDI Routing.

Next, navigate to the first port your MIDI controller is connected to. In my case, it’s DIN 1 which is connected to my Nord. I want to rename that port to represent my controller. I’m going to click DIN 1 under the DIN options under Sources (or Input on newer versions of Auracle for X-Series).
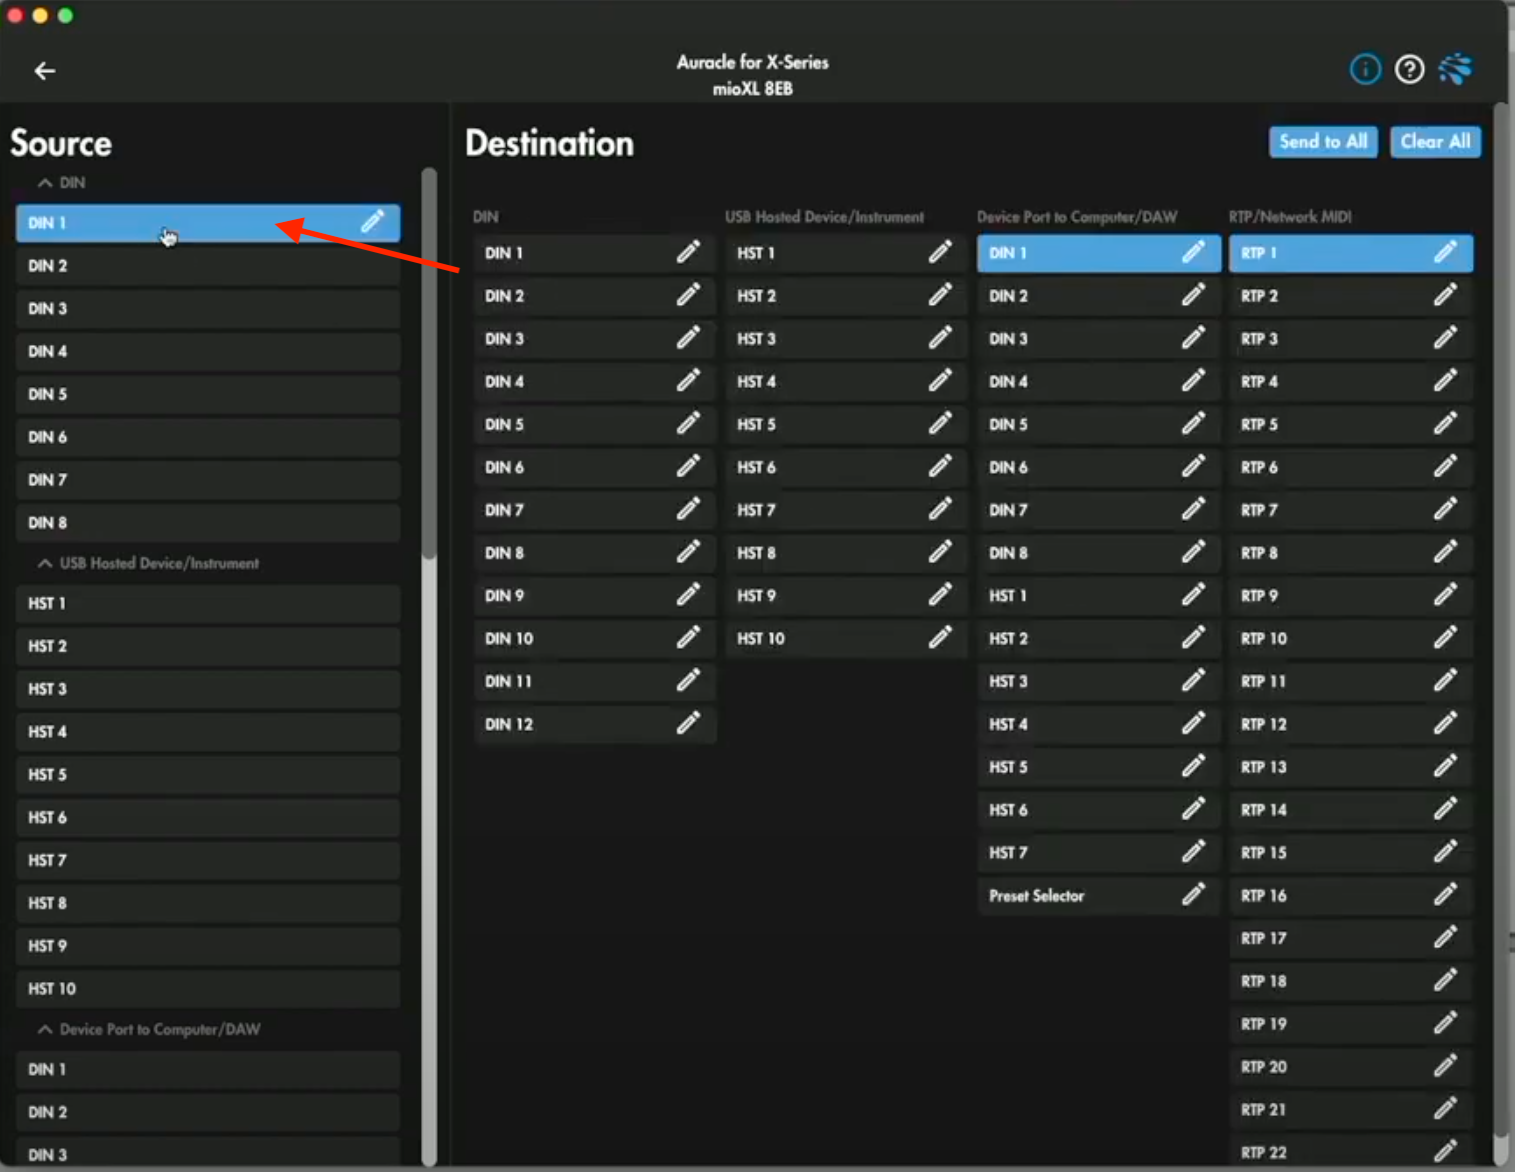
Next, I’m going to click the pencil icon next to DIN 1. You can either click this under Destinations (Outputs) or Sources (Inputs).

Type the name of your controller, in my case I’m going to type “Nord”. Once I’m done, I’m going to click SAVE.

Connecting USB Devices
In this example, I’m connecting my USB MIDI Controller to one of the USB host ports on my mioXL. To use USB MIDI Controllers with the XL, you have to create a USB Host Port Reservation. This will ensure your MIDI Controller and routings stay consistent every-time you use your interface and DAW. Here’s how.
Click USB Host Reservation.

Click the dropdown for Host 1.

I’m going to choose my MIDI Controller from the drop-down to reserve it for Host 1.
Renaming Host Port 1
Now that I’ve reserved host port 1 for my USB MIDI Controller, I want to rename Host 1 to match. I’m going to follow the same process I did before with my DIN port.
Click MIDI Routing.

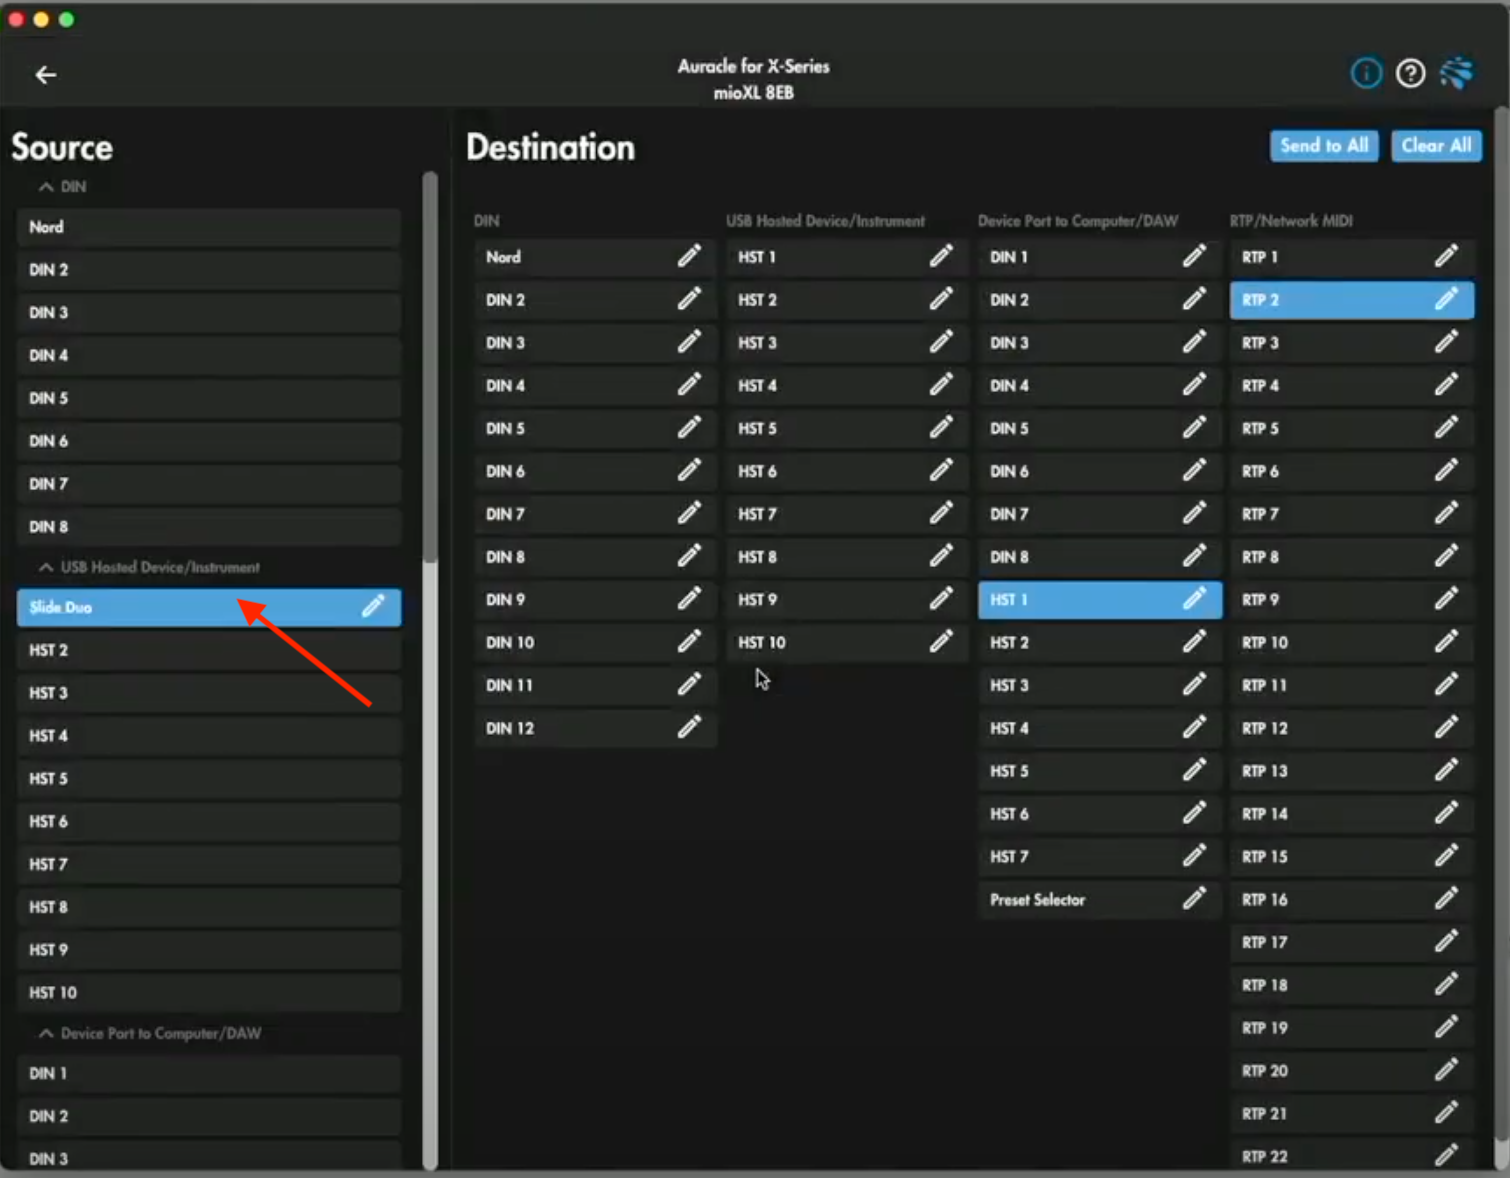
Click HST 1 under the USB Hosted Device/Instrument under Sources (or input). To select the MIDI Controller connected to HST 1.

I’m going to rename my host port to Slide Duo. Click the pencil icon next the source and re-name it to match my MIDI Controller.
Once our MIDI connections are re-named, we’re ready to start setting up RTP Network sessions.
I’ll be doing this process on a Mac, but if you’re on a Windows PC, I’d suggest using RTP MIDI , which is a free download. Here’s a free tutorial showing you how to setup RTP MIDI on Windows. It’s a very similar process to the setup on Mac.
Creating RTP Sessions on Mac
On Mac, I’m going to use Network MIDI under the audio/MIDI setup which is included for free to setup an RTP network Session. Here’s how:
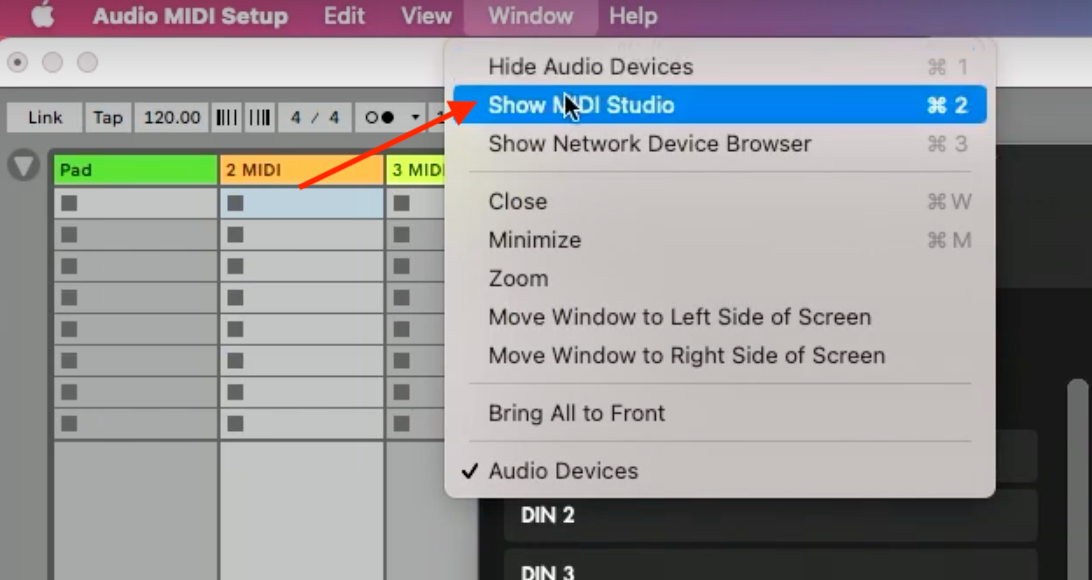
Open Audio/MIDI setup on your Mac

Navigate to the MIDI studio using Window/Show MIDI Studio menu option.
To get to the Network MIDI browser, use the MIDI Studio/Open MIDI Network Setup menu option.

With the MIDI Network Setup window open, click the plus icon to create a Session.

In the “local name” box, I’m going put the name of the controller this connection will represent. Local name is what is going to show up in your DAW. In my case, that’s going to be “Nord”.

In Bonjour name, I’m going to type “Ableton1”. This is the connection that will show up on the Network. This is what I’m going to use in Auracle for X-Series also to establish our connection.

Once I’ve named my session, I’m going to choose “Anyone” under “Who may connect to me”. This will allow all the connections to happen without any issues.

Finally, I’m going to click “Enabled” to enable the connection.

At this point, I’ve created two network sessions on my computer. Now, let’s connect the two sessions on my computer to the two RTP sessions in Auracle for X-Series.
Connecting mioXL RTP Ports to Computer RTP Connections
Click RTP/Network MIDI.

For my first RTP connection, I’m going to choose “Initiator”.

I’m going to type the name of my first Bonjour session in the box next to RTP 1. In my example, I’m going paste “Ableton1” and press Save.

After a few seconds, you’ll see the connection established with your computer. If you return to the MIDI Network Setup screen, you’ll see your mioXL’s first RTP port listed under “Participants”.

I’m going to follow the same exact process to connect the second Network Session to the second RTP session in Auracle for X-Series. Once that’s done, I’m going to re-name my RTP ports and start routing MIDI.
Re-naming RTP Ports
To follow the same process we’ve done previously, let’s re-name our RTP ports before we do our MIDI routing. I’ll re-name these ports under the MIDI Routing, again following the same process we’ve done previously. In my case, I’m going to re-name RTP 1 to Ableton 1 and RTP 2 to Ableton 2. Now, let’s get to MIDI routing.

MIDI Routing
Now, we get to reap the benefits of our time spent re-naming MIDI ports. Let’s route the MIDI from DIN 1 to RTP 1 and HST 1 to RTP 2. In order to make this happen, we simply ask, “where is my MIDI coming from, and where do I want it to go”? I click on that as my source/input, and then click on the destination/output that I want to send MIDI to.

Setting up MIDI input/outputs in your DAW
Now that all my MIDI routings are setup properly, I can send MIDI from my DAW (in my case, Ableton Live) and send MIDI from my MIDI controllers to Ableton Live. You can see in the examples below that I have access to both of my MIDI Controllers in Ableton Live, with only an ethernet cable.


The power of this setup is that you can connect all your MIDI controllers to your mioXL and connect them all to your DAW with just an ethernet cable. Even if they’re in another room, or many feet away, it will be like they’re sitting right next to you and you’ll have to all our gear easily thanks to the mioXL!