
How to Setup and Use mioXL Without a Computer (Step-by-Step Guide)
A DAW? Pfft. Don’t need one.
By saving presets and recalling them on mioXL’s front panel, you can plug in and connect your MIDI gear anywhere — no computer or DAW required. In this blog, you’ll learn step-by-step how set up and configure mioXL to connect your MIDI gear in a “DAW-less” set up.
But first you need to, ahem, connect it to your computer.
I know what you’re thinking, “I thought this was how to use mioXL without a computer?!” You’re right — it is. But to do that, you need to use a computer to create and save your MIDI mappings and presets so you can easily recall them to operate your mioXL without a computer.
I know, it’s ironic. But let’s start with our first step — how to connect mioXL to your computer.
Step 1: Connect mioXL To Your Computer via USB
The very first thing you need to do is take your USB cable and go from mioXL’s USB DAW connection into your computer.
Next, download Auracle for X Series.
This free software is where you’ll connect and configure your mioXL MIDI interface. This is how you’ll actually create your MIDI routings and save your presets so you can recall them later directly on mioXL.
Alright, so after we’ve connected to the computer and have Auracle for X Series open, we’ll quickly configure some settings and then disconnect from our computer.
Let’s get started and create and save our MIDI routings.
Step 2: Create and Save Your MIDI Routings
We could really deep dive into this — the possibilities are virtually endless — but we’re going to keep things simple for the sake of showing you how this works.
We’ll create two scenarios that will set up your mioXL to be used without a computer.
In the first scenario, we’ll make DIN 7 our master controller and send MIDI out to DIN 8-12.
Here’s how you do that.
First, select MIDI Routing in Auracle for X Series.

Next, you’ll select DIN 7 in the Source/Input panel.
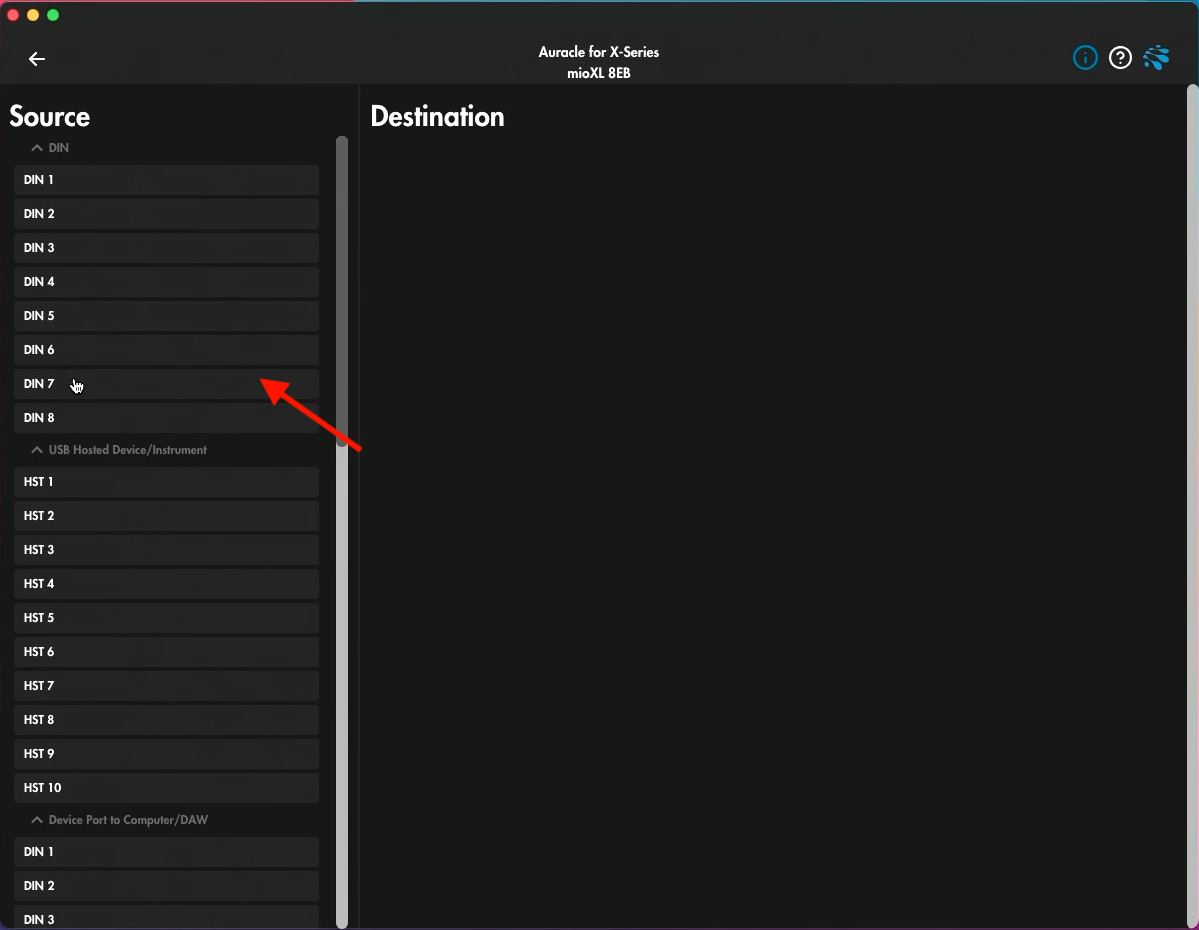
Then, under Output/Destination, you’ll select DIN 8, DIN 9, DIN 10, DIN 11, and DIN 12.

This is a very simple three-step process for this scenario:
Open MIDI Routings
Select DIN 7 as your source/input
Select DIN 8, DIN 9, DIN 10, DIN 11, DIN 12 as your destination/output
That’s our first scenario — maybe it’s a keyboard that we want to send to those outputs.
But what if you want to have another option where you have a similar set up but you want whatever’s connected to DIN 1 to go to those outputs? You can! But first you need to save the configuration for the first scenario as a preset.
Here’s how to do that.
Step 3: Save as a Preset
Go ahead and back out of MIDI Routings to return to the main screen in Auracle for X Series.
Click Presets.

You’ll then see, under Save/Load, the preset that’s currently loaded. Right under that, you’ll see the option Save Preset As. Your screen should look like this:

Click on Save Preset As and select whichever preset you want to save to. For this scenario, we’re going to choose Preset 1.

A window will pop up to enter a new name for preset 1.
Considering our scenario with our master controller coming into DIN 7, we’re going to name this “DIN Master 7”.

Click Save, and then you’re done!
Now, let’s talk about our second scenario, where we want DIN 1 to be our master controller going out to DIN 8-12.
Step 4: Save Additional Presets and Settings
Back out of Presets to get back to Auracle’s main screen.
Click on MIDI Routing.
The first thing you want to do is back to DIN 7 as your source/input, and then deselect DIN 8-12 as your destinations/outputs.
Once you’ve done that, select DIN 1 as your source/input.
Then select DIN 8, DIN 9, DIN 10, DIN 11, and DIN 12 as your destinations/outputs.
Now, you’ll repeat step two, but instead of saving this as Preset 1, you’ll save it as Preset 2.
We’ll name this DIN 1 Master.
You can imagine the possibilities with this. You can have any DIN connection go to whatever outputs you want, have it filter, or have it remap. There’s so much you can do with this. But, for the purpose of showing you how to actually do this, we’ve kept our set up very simple.
With everything mapped and our presets now saved, we’re ready to disconnect mioXL and use it without our computer.
Step 5: Recall Presets on mioXL Without a Computer
There are two ways to navigate presets on the mioXL.
First, you can use the knob. So, let’s do that to navigate to our saved preset, DIN 7 Master.

To actually load the preset, press the knob.
The second way you can navigate and load presets is with mioXL’s touchscreen panel. You could scroll to whichever preset you want, then press Load on the touchscreen panel. You can also use the Next and Back buttons to browse though your presets.

So if I want to switch to DIN 1 Master, I can just scroll to that and press Load on the touchscreen panel.
And that’s it!
You’re now ready to use your mioXL without a computer.
Quick Review and What to Do if You Need Help
Let’s quickly review all the steps.
Step 1: Connect mioXL to Your Computer
Step 2: Create and Save Your MIDI Routings
Step 3: Save as a Preset
Step 4: Save Additional Presets and Settings
Step 5: Recall Presets on mioXL Without a Computer
If you have any questions that weren’t covered here or if you need help for any reason, you have two options to get the answers you need!
Check out iConnectivy’s Knowledge Base.
Contact the iConnectivty Support Center.