
Creating a Redundant Playback Rig with PlayAUDIO1U
Imagine you're on stage, and something goes wrong with your playback computer. What's your backup plan? With the PlayAUDIO1U, you're not just prepared; you're equipped with an automatic switch to a backup rig, ensuring that the show goes on without a hitch.
This article dives into setting up a redundant playback rig using two computers running identical playback sessions, seamlessly connected with the PlayAUDIO1U.
Setup and Connectivity
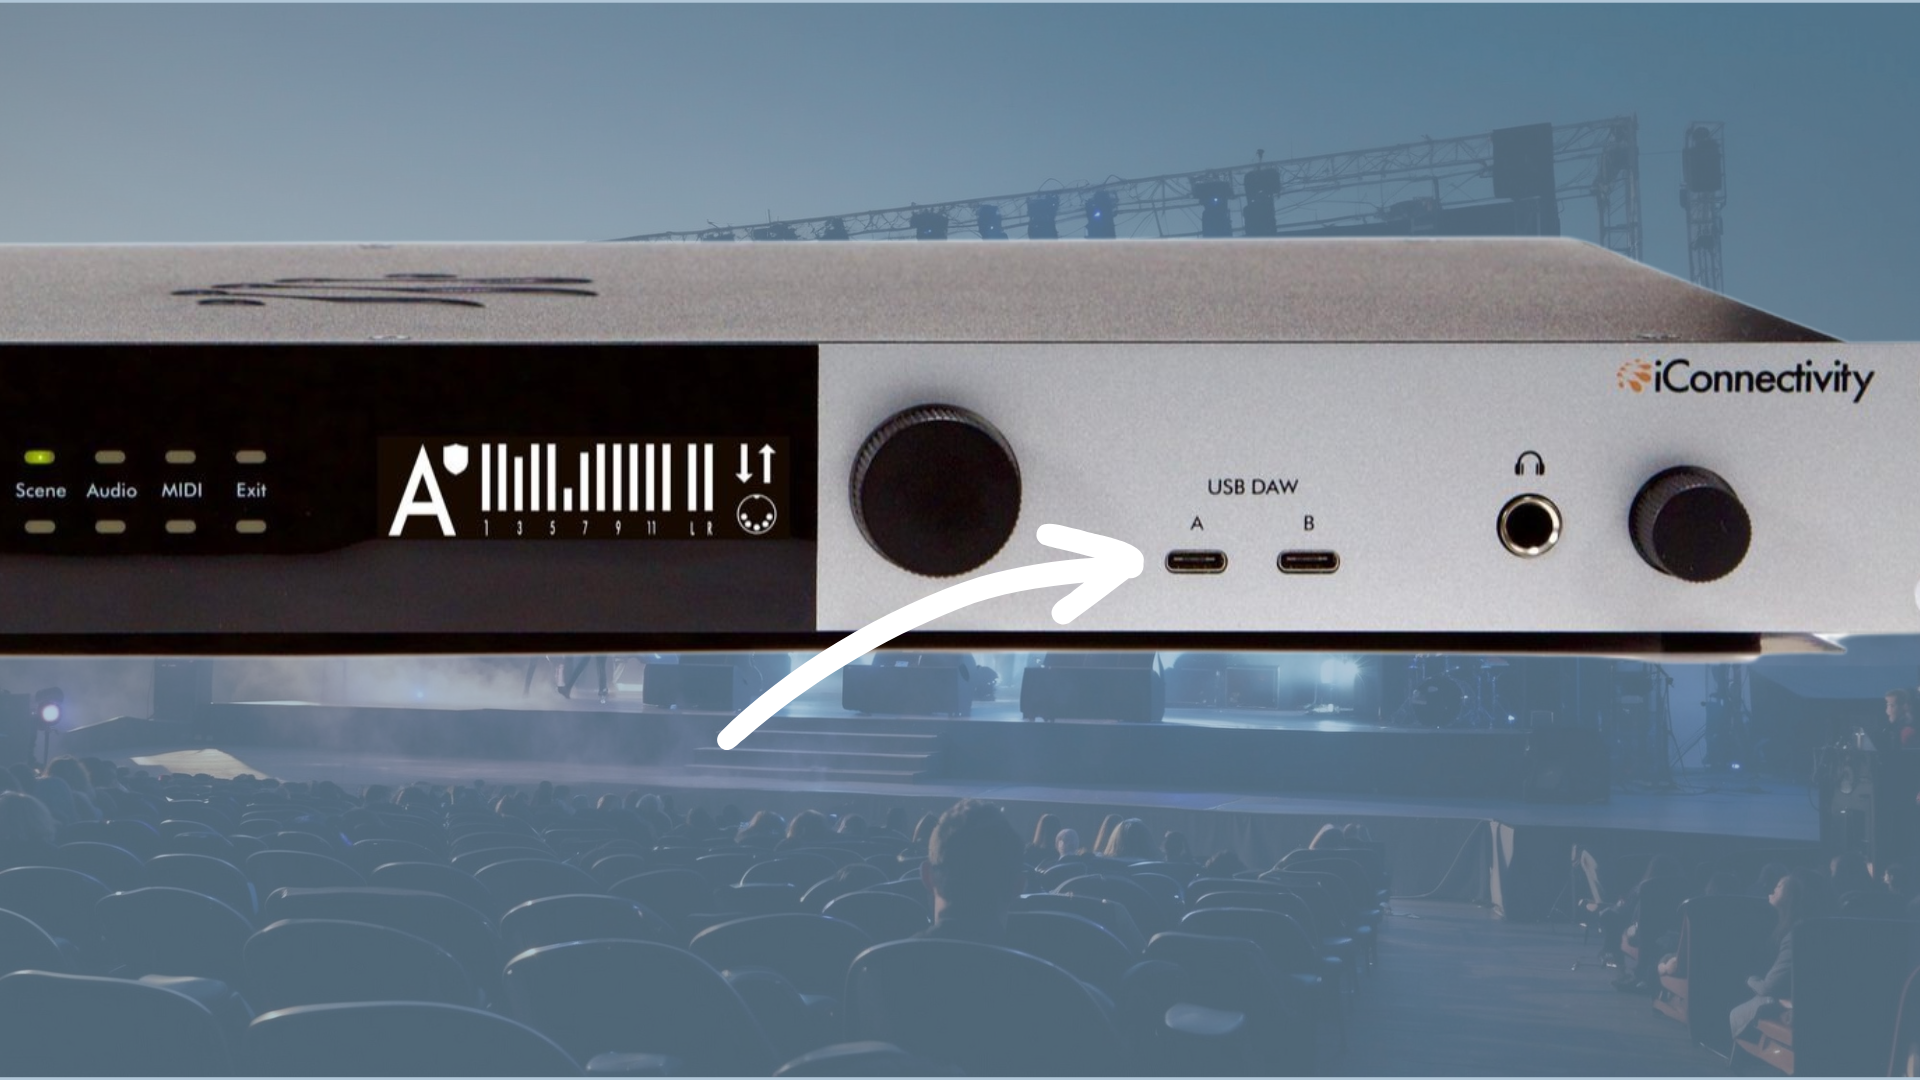
To start, connect two computers—Computer A and Computer B—to the PlayAUDIO1U using USB-C cables. Both computers should have identical specs, and should have the same session of your DAW loaded. This setup ensures both systems are in constant sync and ready to take over if one fails.
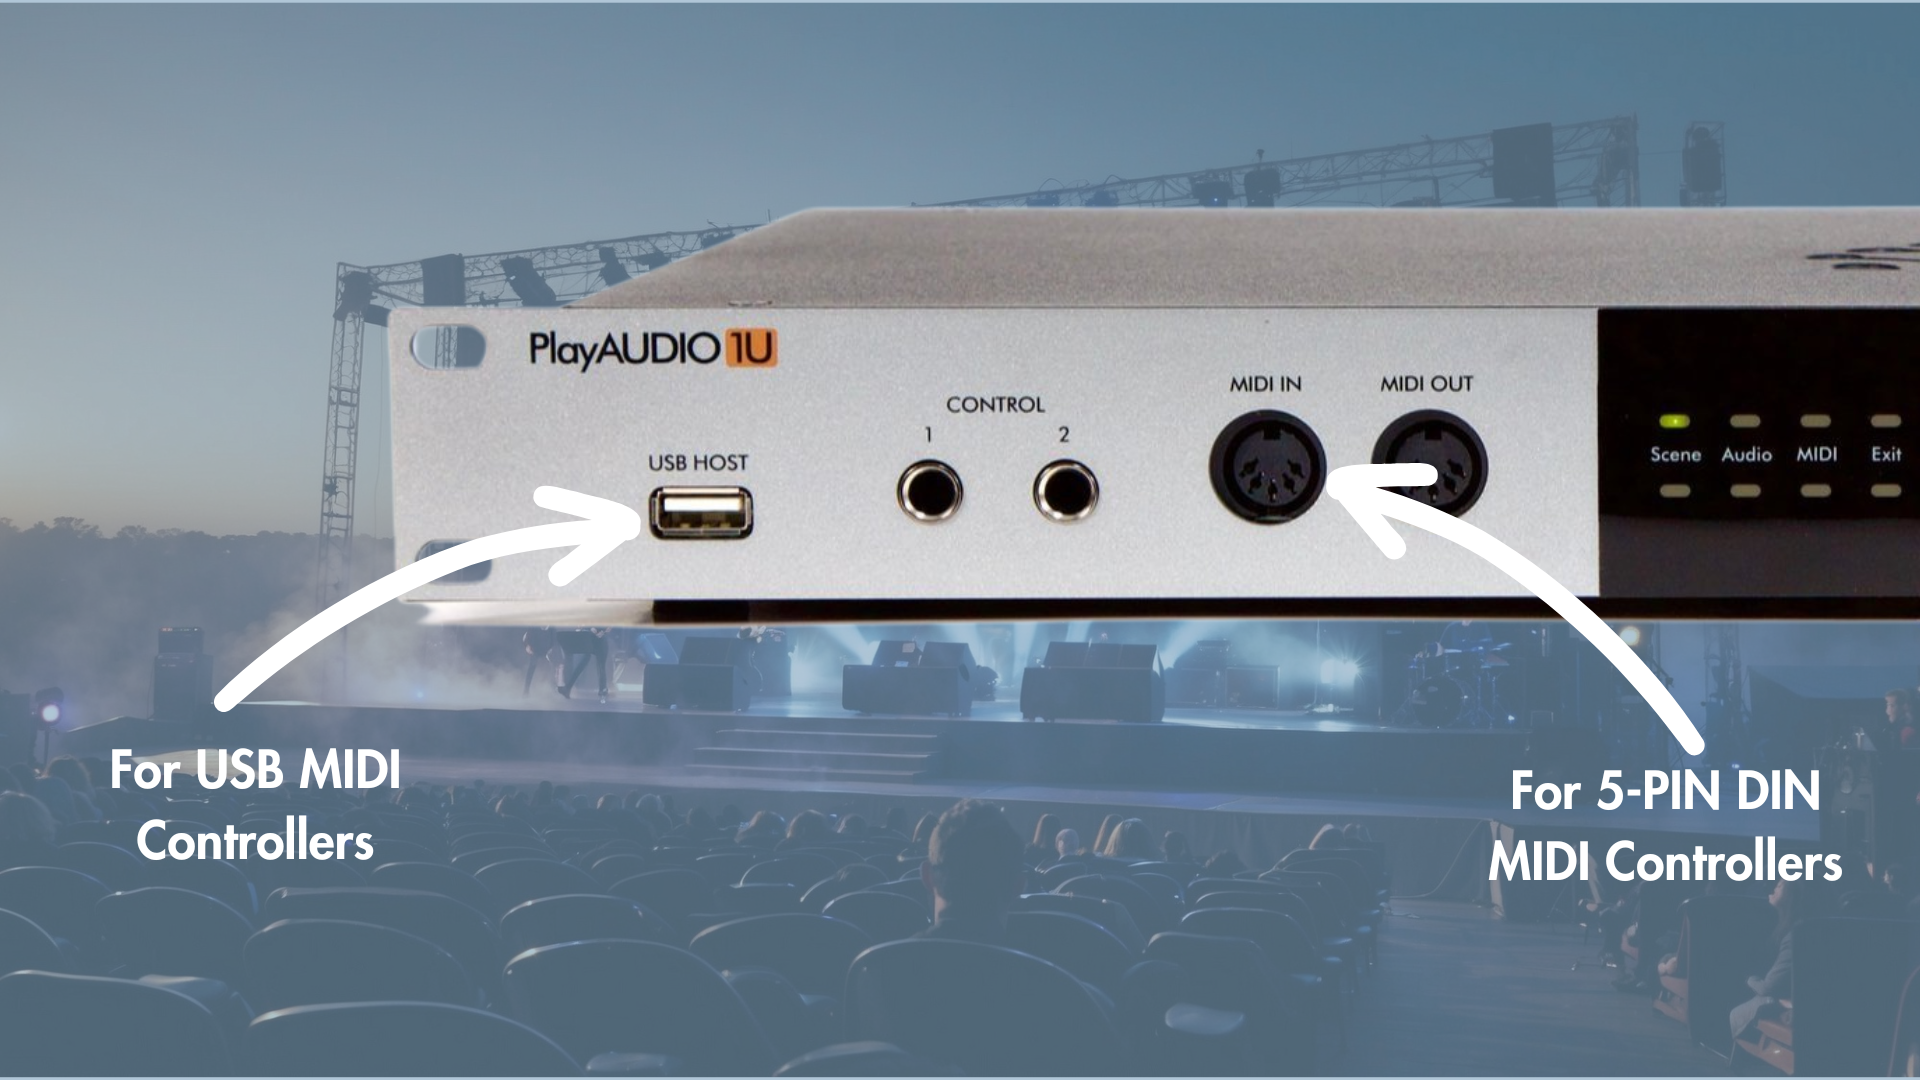
Next, connect your MIDI controller by connecting it to the USB host port on the PlayAUDIO1U, allowing MIDI commands to be sent simultaneously to both computers.
Configuring via Auracle for X-Series
Using the Auracle for X-Series software (download here —> iConnectivity's Auracle), configure the audio settings to suit your session's needs, whether it's setting up outputs, adjusting sample rates, or managing audio levels. The software serves as a control center, enabling precise management of your audio interface settings. Here’s a few suggested settings (with screenshots):

Reserve A Host Port: If using a USB MIDI controller connected to the USB Host port, make sure to use the USB Host Reservation tab of Auracle for X-Series and choose your MIDI controller, so it’s “locked” to a USB host port.

Headphones or 14 Outputs: You can use the “audio” page of Auracle for X-Series to choose to use the headphone output on your interface to create a separate headphone mix, or to use the output as outputs 13/14.
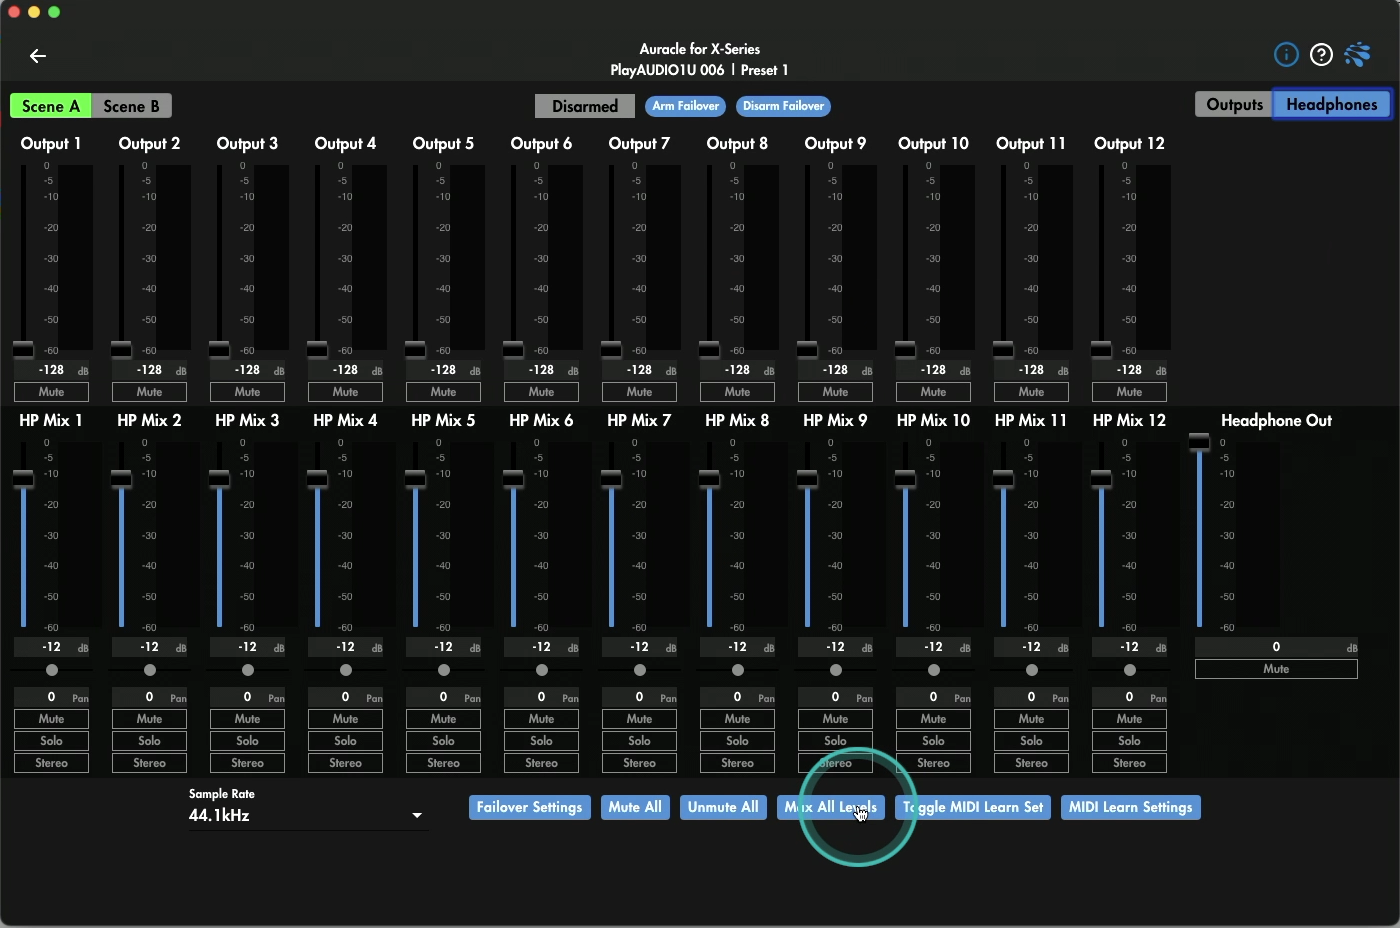
Max All Levels: To max out the output levels of the interface, you can click the “Max All Levels” button to raise the output level of all outputs on your interface.
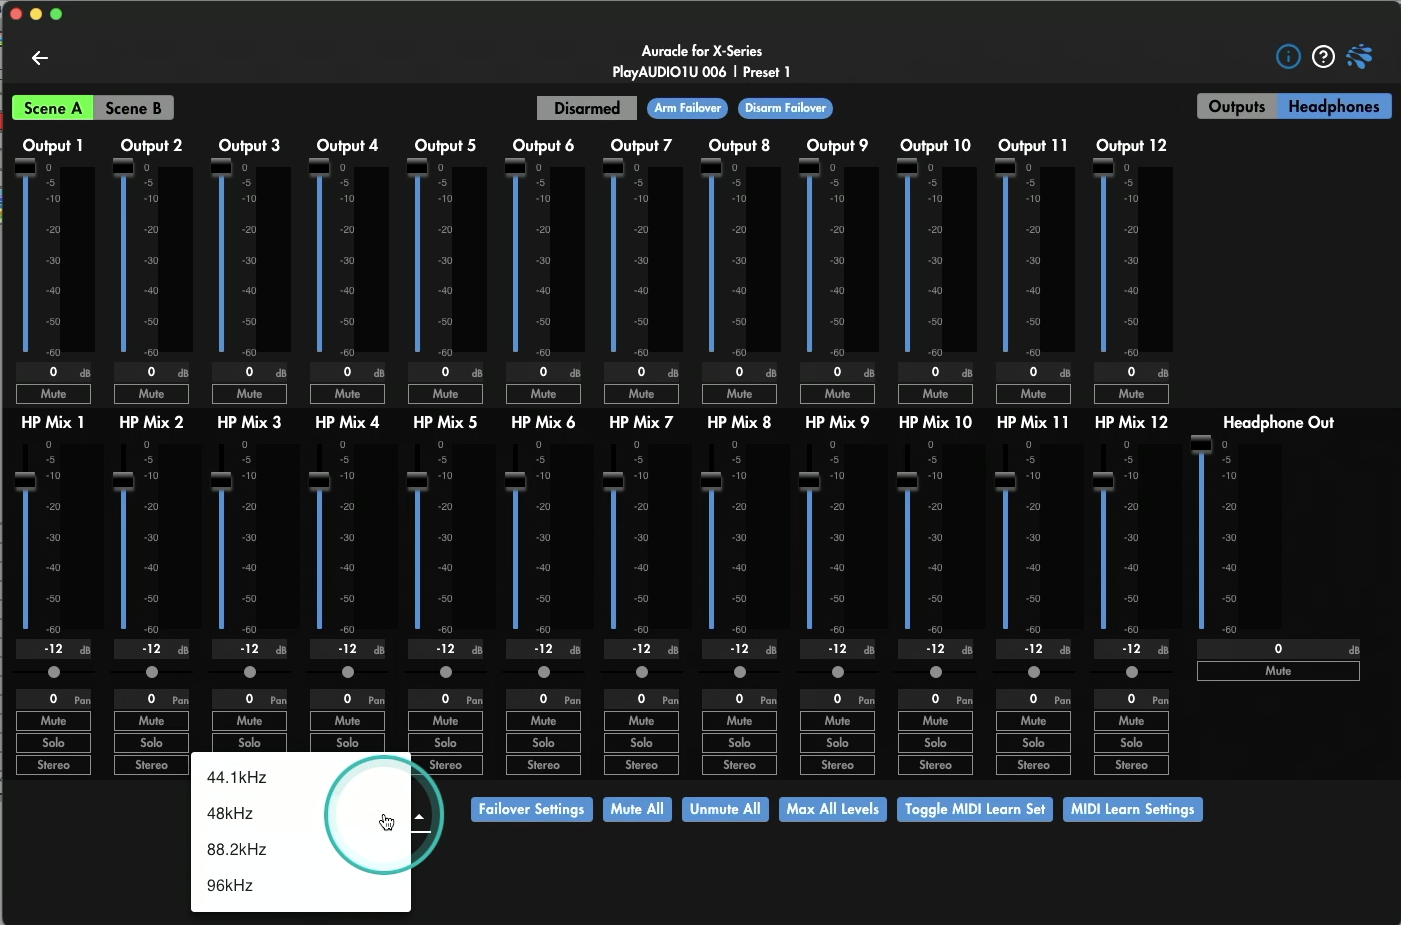
Choose Your Sample Rate: Choose and set the sample rate of your PlayAUDIO1U in Auracle’s audio tab.
DAW Setup
While the setup will change based on your DAW, we need to choose our interface, route our tracks, and setup MIDI control of both of our DAW sessions. We’re using Ableton Live for this example, but you can complete the same steps in your DAW of choice.
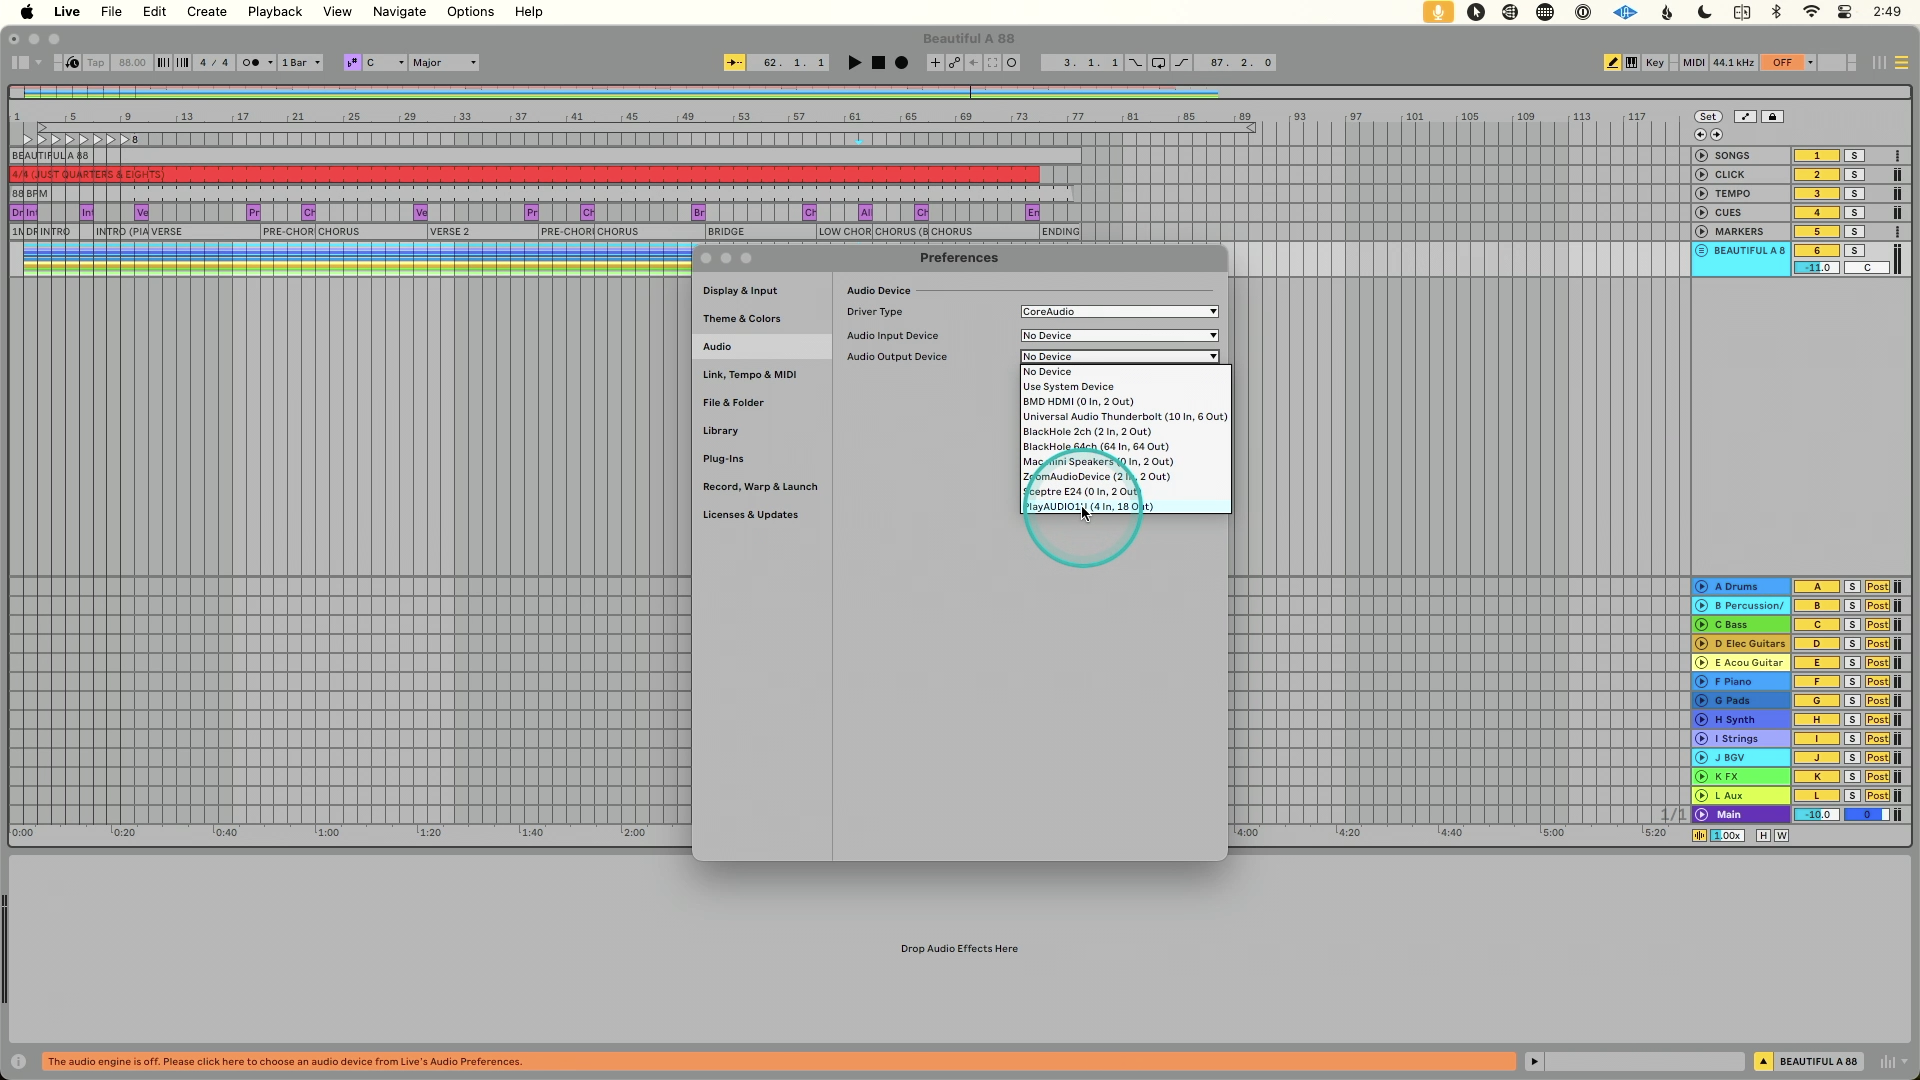
Setup your Interface: In your DAW choose the PlayAUDIO1U as your interface, on both computer A and computer B.

Route Tracks to Outputs: In your DAW, route your track outputs to the PlayAUDIO1U. Make sure to route tracks to identical outputs on both computer A and computer B.
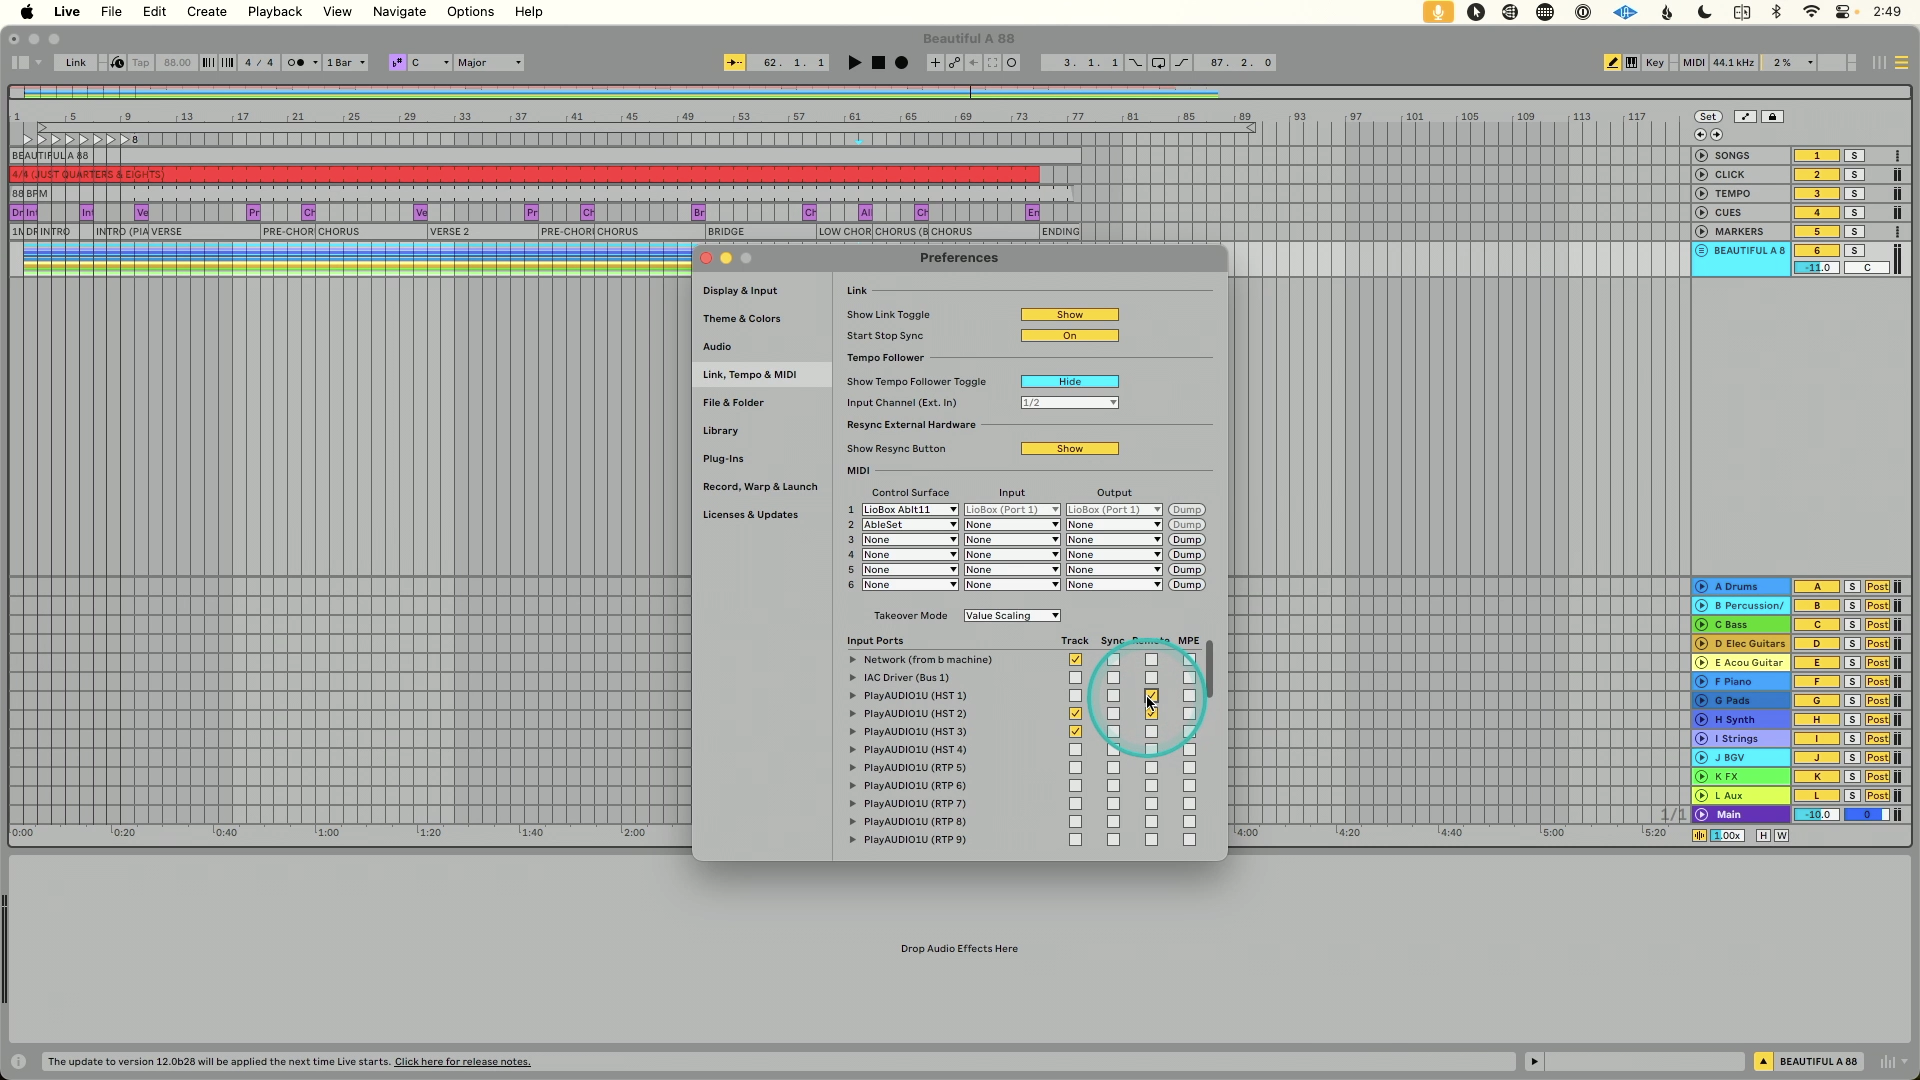
Setup MIDI Control: In your DAW, setup your MIDI controller in both computer A and computer B, so that your MIDI controller can control both computer simultaneously. In this example, we reserved Host Port 1 for our MIDI controller, so I’ve enabled MIDI remote control on Host Port 1in both DAW sessions.
Implementation of the Backup Plan
To activate the automatic backup functionality, incorporate the LifeSine plugin, which continually runs a sine wave signal through your setup. Download the LifeSine plugin from the iConnectivity website.
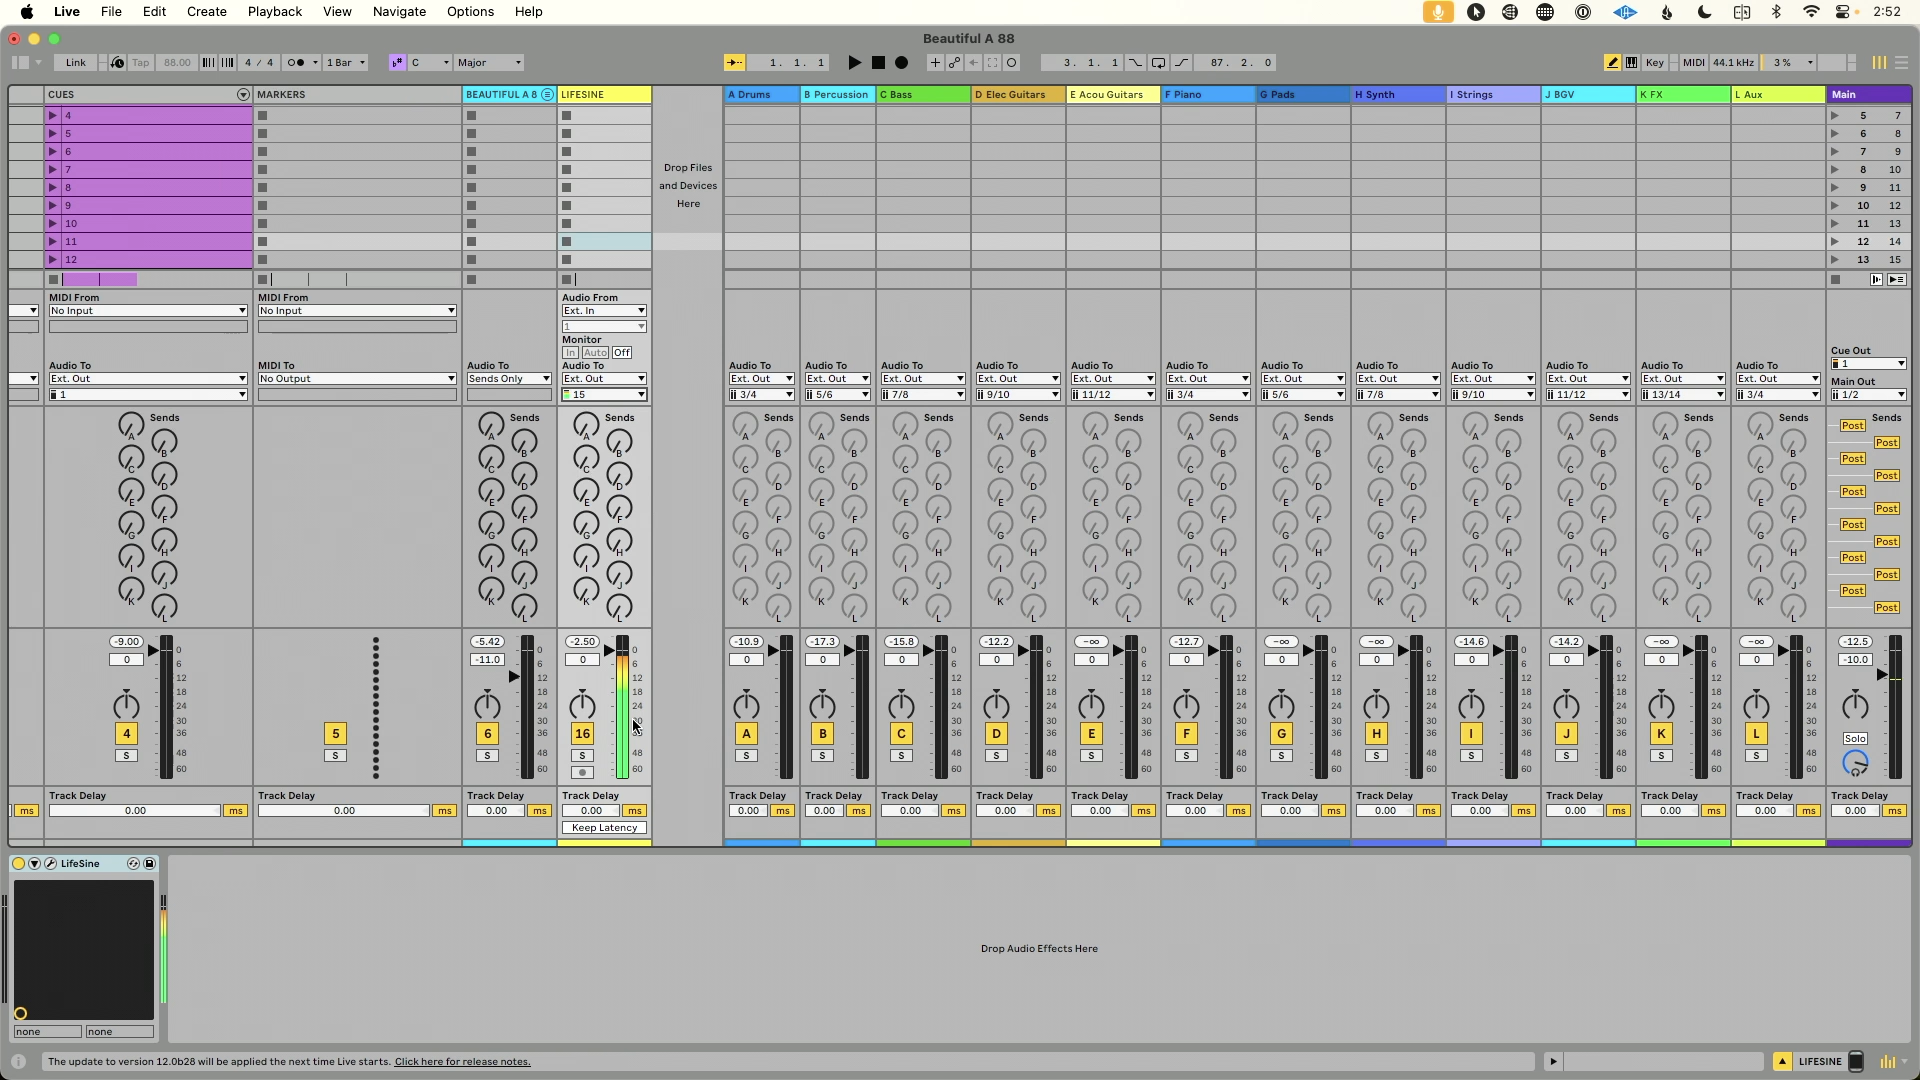
On Computer A, create an audio track in your DAW
Add the LifeSine plugin to that track
Set the output of that track to output 15
Routing this audio track from computer A to output 15 will enable the automatic failover feature of the PlayAUDIO1U.
Shield Means Safe

After you’ve routed the output of the LifeSine plugin to output 15, you’ll notice a “shield” icon on the front panel of the interface. The shield means you’re safe. If someone were to accidentally trip on cable, if your DAW were to crash, the PlayAUDIO1U will automatically switch to the B computer.
As a fun “party trick”, demo this feature by dramatically pulling the USB-C cable from the USB DAW A port and watch and listen how quickly the interface switches to computer B, while continuing to play audio-without skipping a beat.
Redundant Audio to Front of House
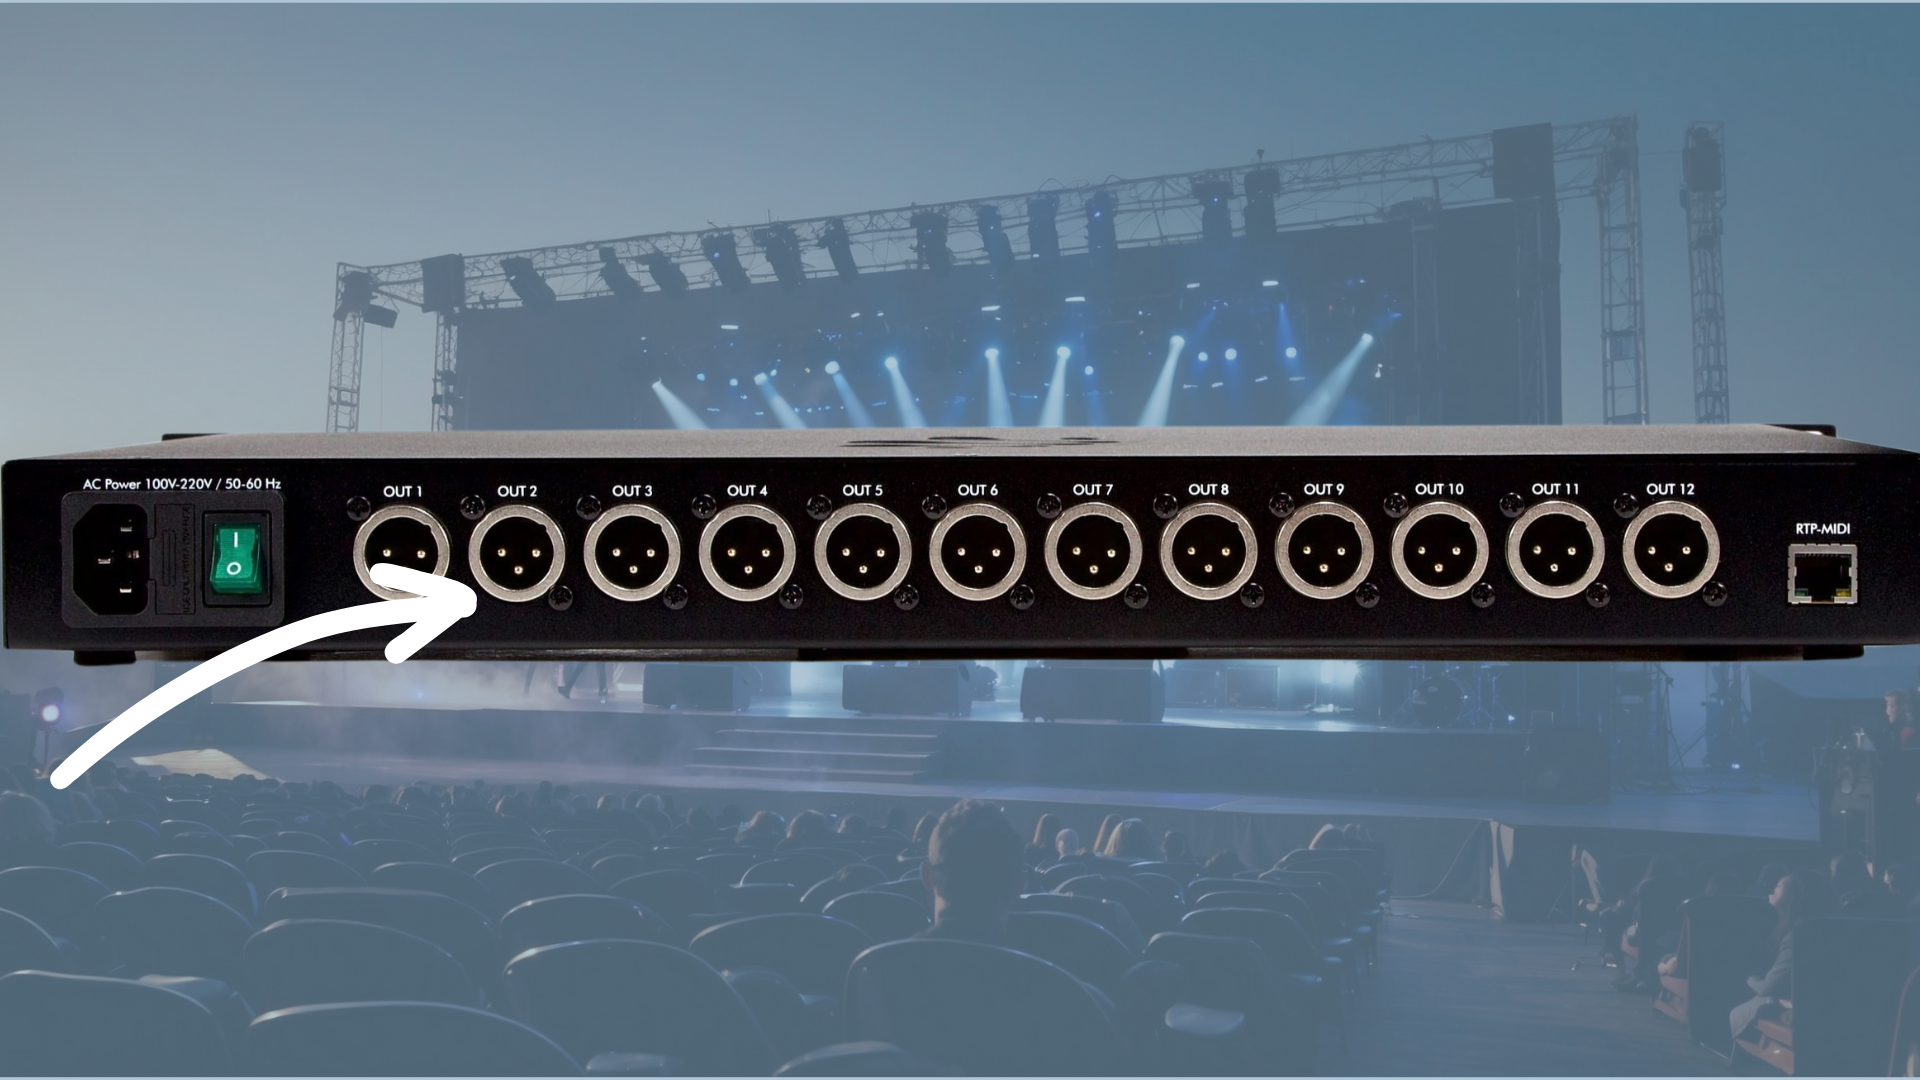
With the 12 XLR outputs on your PlayAUDIO1U, you can connect XLR cables from the outputs to your soundboard or to a stage snake that connects to your soundboard. This ensures that Front of House hears only one computer at a time, and when the PlayAUDIO1U automatically switches to the B computer, no one can tell, and the Front of House audio engineer doesn’t have to change a thing.
The Show Goes On…No Matter What!
By following the steps outlined in this guide and utilizing the LifeSine plugin, you can safeguard your performances against unforeseen technical issues. Embrace the reliability of a redundant playback rig and focus on what truly matters—delivering an unforgettable performance.
For further exploration of redundancy and other advanced features, or if you have any questions, feel free to check out our previous articles on our blog or visit our help center for more assistance.